
Find your favorite pumpkin cookie cutter and bake cookies using one of our
recipes or your own. For every 18-20 pumpkin cookies (depending on the size of the cookie cutters you are using), make a batch of frosting using one of our
frosting recipes.
Divide frosting in half. Color one half of the frosting orange; set aside. Remove 2 T. of frosting from remaining half and color it red. Color half of the white frosting black. Divide final portion of frosting in half, leaving one half white and coloring the other half green.
Prepare 4 disposable bags using two #3 tips, one #2 tip and one #4 tip. Fill the #2 tip bag with black frosting and the #4 tip bag with red. Fill one #3 tip bag with green and the final bag with white. Secure all with rubber bands.
Turn all orange frosting into glaze by adding water, a few drops at a time, until it is a thin consistency. A drop of the icing should disappear into the mass on the count of 6 or 7. It will be similar in consistency to school glue: fairly runny, but not so thin that it's hard to control.
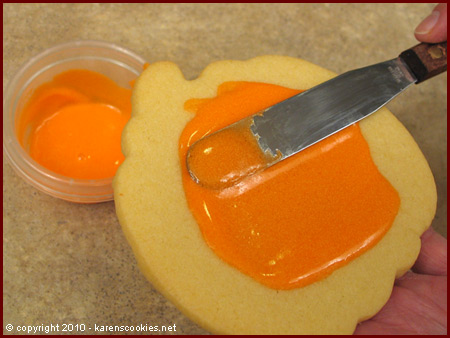
Glaze pumpkin cookies orange. You do not need to glaze the stem. Allow to dry for several hours.
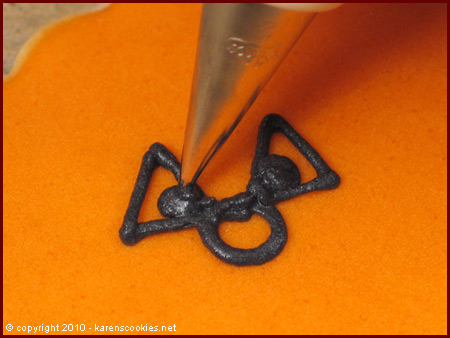
Using black frosting, pipe a small circle for a nose in the center of the pumpkin. On either side of the nose, make triangles for the eyes. Fill in the inner corners black for pupils.
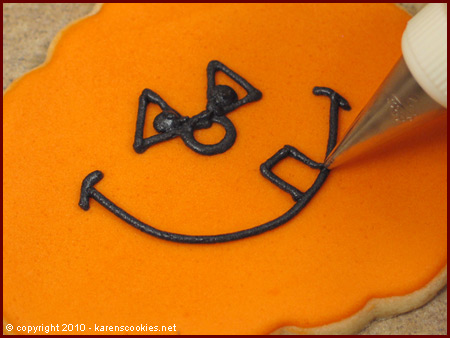
Make a mouth with black frosting. Pipe two small curved lines for cheeks. Connect these lines with a deeply curved line for the mouth. Make a rectangle on top of the mouth for a tooth.
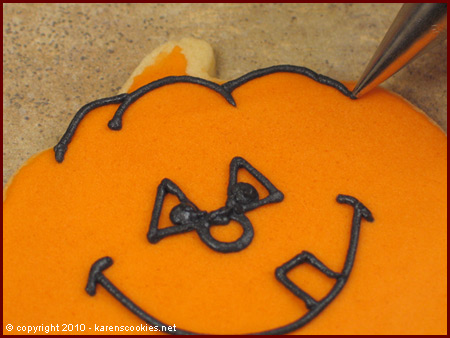
Start outlining the pumpkin in black, by making three ridges just below the stem. Pipe an arch in the center, then make two more arches
extending from the first one.

Repeat step 4 at the bottom of the pumpkin. Start at the center, directly below the mouth, and make a "U" shape. Extend a curved line from either side of that "U".
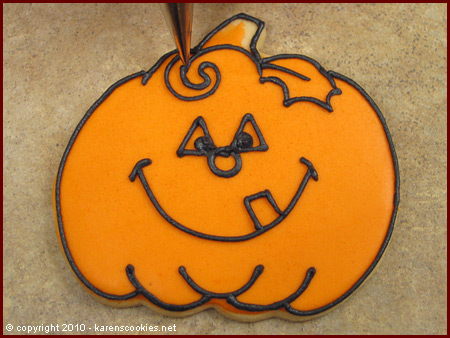
Complete the outline by finishing the two outer ridges of the pumpkin and then outlining the stem. Add a leaf to the right of the stem, and a small curly vine to the left.
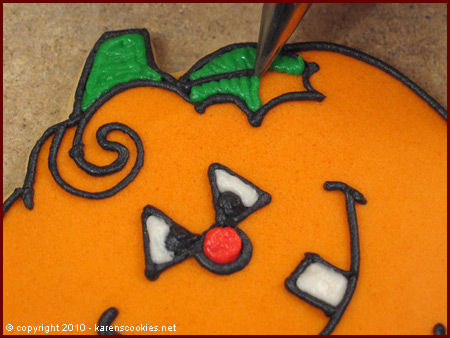
Fill in the stem, vine, and leaf with green frosting. Fill in the nose with red. Finally, fill in the eyes and tooth with white.
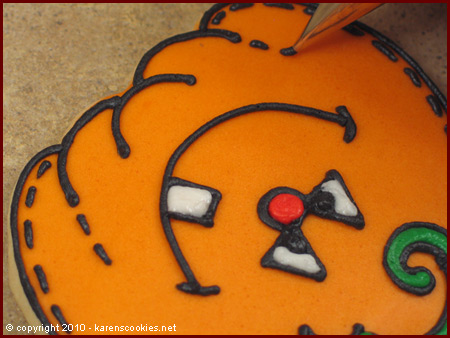
Using black frosting, add some "stitching" along the outer ridges by piping small broken lines. Extend the ridges by adding a few stitches to the lines created in steps 4 and 5.
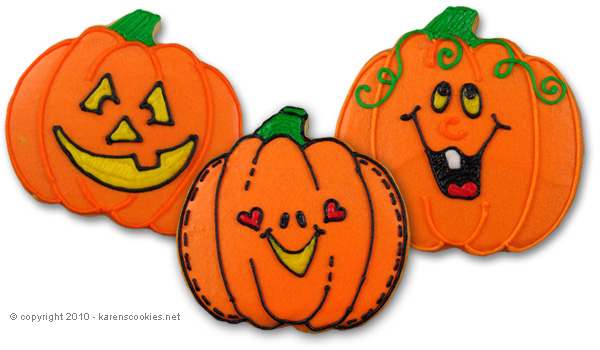
Pictured above are just a few more designs you can create with pumpkin cookie cutters. Of course,
there are limitless other designs and faces you can try. Get creative and see what you come up with.
Good luck and have fun!