Some cookies have more than one color of glaze on the same cookie, and some cookies are only partially glazed. In order to learn how to glaze using these techniques, it may be helpful to review the glazing tutorial by clicking here.
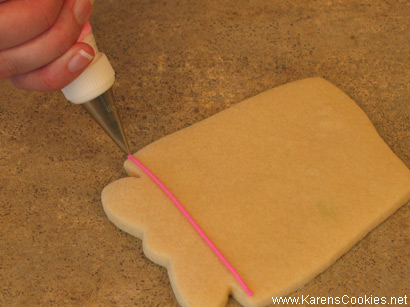
Let's start with partially glazing a cookie. This is a very useful technique if you want just a portion of the cookie glazed. You will need full-strength (not watered-down) frosting in the same color as the glaze you will be using.
Use a #2 or #3 tip to pipe a dam of frosting where you want the glaze to end.
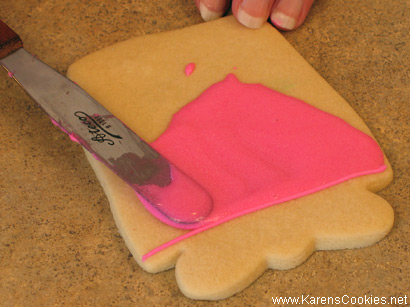
Apply the glaze as usual, pushing the glaze up to the dam of frosting.
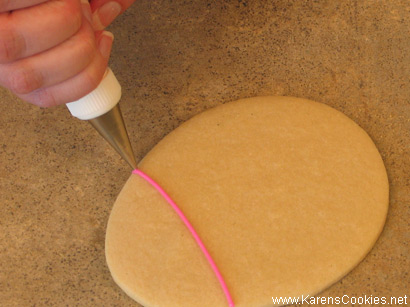
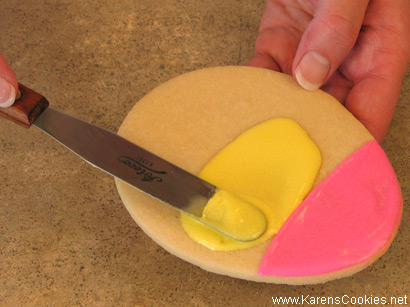
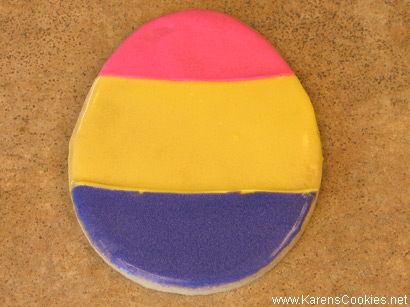
Glazing with more than one color is pretty much the same idea as the partially glazed cookie, except that you will be glazing on both sides of the dam. Start at the top of the cookie and work your way down. I will use an Easter egg to demonstrate. My top color will be pink, the middle color will be yellow, and the bottom color will be purple.
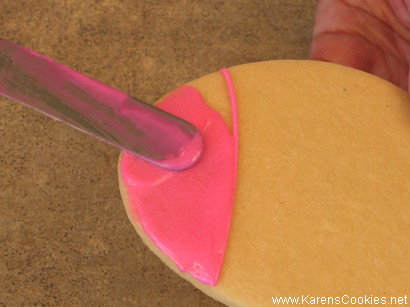
Make a dam for your first color of glaze. Since my top color will be pink and my middle color will be yellow, I can make my dam of frosting in either pink or yellow. Make the dam where you want that first color to end and then glaze that section, pushing the glaze right up to that line of frosting.
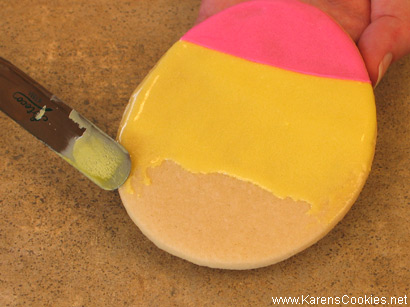
Now glaze the middle section, pushing the second color (yellow for me) right up to that same line that we used for the first color, and spreading it down below where you want your third color to start.
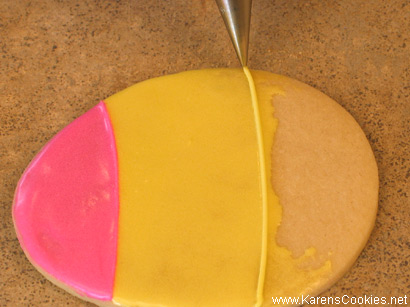
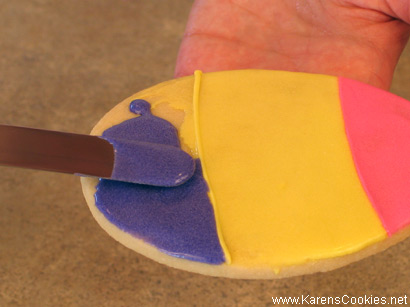
Finally, make a dam for your third color, right over the glaze you just did. You can use either color (yellow or purple) for the dam. Glaze the bottom section, pushing the glaze up to the line you just made.
This technique can be used whether you are using 2 colors or 5 colors, and whether you are going up and down or left to right. Be creative and have fun with it!